Posts

Lab 4 - PID Control

Image
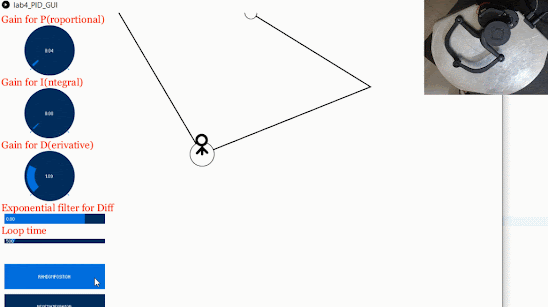
Introduction: The main objective of this lab was to gain familiarity with controlled actuation and path-following using PID control by understanding the behaviour exhibited by each parameter. Before starting any of the assessments, I noticed that precisely adjusting the PID values using the control knobs was awkward. The sketch contained code to increment these values through key presses, but these changes were not reflected on the UI. I added a few lines of code in the KeyPress() event to fix this issue, and the result made tuning the parameters much easier. Secondly, I was unable to perform any assessment with the end-effector's star-shaped "head", as the magnet on which it sits was unable to stick to my Haply. The code for this lab can be found here . 1) Run the code and try out the P controller. How does it feel? What happens when you change the target position? What does changing the P parameter do? Do you notice any problems? Snapping to the original target positio

Lab 2 - Generating a maze

Image
Note: in case images appear unclear, you can view them in a slightly higher resolution by clicking on them. Objective & Introduction: My understanding of the objective of this lab was to create a maze using the Fisica library and Haply hardware, based on the examples that came included with the Haply library. As with three other students, I received my Haply late and worked on this lab during late-semester crunch time, but acknowledge that I had the benefit of looking at past comments by students in the CanHaptics Discord, being provided with flexible deadlines for lab submissions, and even peeking at existing work performed by other students, so there really wasn't a downside to working later given the circumstances. I don't talk about the Haply assembly experience here but in my project iteration 2 blog instead, as that was the earliest assignment due by the time I received the hardware. In summary, neither the Haply hardware nor the software environment was painstaking

Iteration 2

Image
Group Members: Ahmed, Karthik, Kattie ---- In my last project iteration blog , I noted that our team focused too much on trying to represent our bar chart data haptically, and not as much on utilizing the modality itself to enrich the visualization experience such that part of the user experience would be lost without the haptics. We kept that point in mind for the second iteration, even though we weren't initially clear on our objective. I luckily received my Haply just a couple of days after the first iteration; this gave me the chance to work on force-feedback for this iteration. Assembling the Haply wasn't too problematic once I realized that using my own screwdriver set helped more with the screws than using the Allen key that came with the package. I somehow managed to snap one of the motor wires, but rejoining it fortunately wasn't a problem. Altogether, assembly took approximately an hour and a half. Fixing a snapped motor wire during assembly.. yikes. After trying

Iteration 1

Image
Project Goal: To visualize data using the Haply and vibrotactile devices and help answer questions such as “which type of feedback is more suitable for a specific type of visualization?” and “what are some of the ways in which haptics can complement the visualization experience?” Iteration 1 Approach:  Given the circumstances with three out of four of us having different hardware, we took a more experimental based approach: we shared code for developing graphs, tested out various encoding mechanisms using the tactile devices, reported on what we felt, shared our experiences, and then decided on how to go about the next iteration. The first step was to develop simple, common visualizations on which we could compare our haptic experiences. A quick search on Google led me to find a visualization API for Processing developed by an academic team at the City University London. As you can see, this gives us a wide variety of visualizations to test out work on: Of course, this is much mo

L1 - CH501

Image
This lab was done individually. In general, it was a fun activity, although it took a lot longer than anticipated due to the difficulty in finding certain objects I wanted. Though considered, I avoided use of fluids that would make a mess, so all of these are human actuated. Here's a random screenshot I took while working at the 'scrapyard': 1 mm: I use a "series" of pegs for this one. A peg on its own, when squeezed, has a displacement of approximately 1 cm. By connecting the end of a smaller peg to the end of a slightly bigger peg and squeezing the handle of the smaller peg, the displacement of the bigger peg is slightly lower. For this particular combination, the displacement was approximately half a centimeter: Using a larger peg, I was able to achieve a displacement of 1 mm: It would have been nice to squeeze the peg handles via another mechanism, but the spring was quite stiff so the applied force needed to be high enough; one idea I had was to affix the bot

Test..

 Stuff to come soon...